
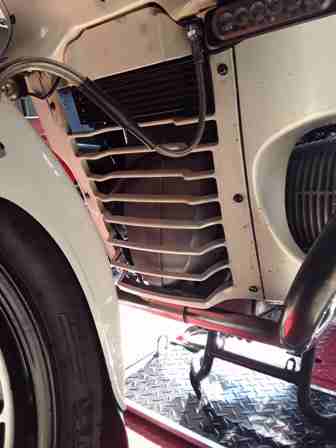
Lower fairing coming off to get to a lot of stuff. Think layers of an onion. |
|
2021 started out as not a good year for traveling of any kind. Especially international travel. In early 2021 I started doing some major work on my motorcycle. It kept me busy and was fun and interesting. I thought I would provide some pictures of the work I did. I've done work on the bike over the years, but this was so much work and occupied so much of this year I thought I'd post this. If you know anything about BMW Airheads, you'll understand what I did by the pictures. If you don't, then you probably could care less about this page of my website anyway...
|
|---|
Lower fairing coming off to get to a lot of stuff. Think layers of an onion. |
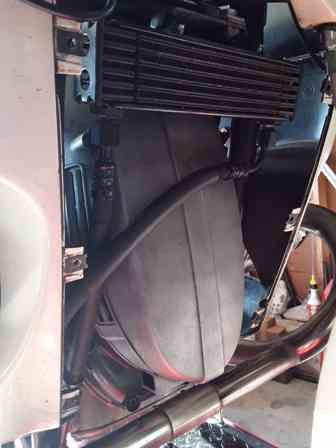
Oil cooler and timing cover needs to be removed to get to electronics and then timing chain behind that. Did I mention I disconnected the battery ground first and set the timing to TDC? |

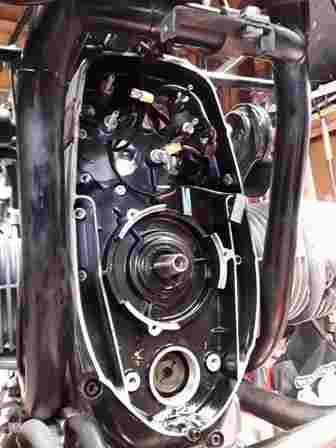
Removing timing cover exposes alternator stator and rotor, 'beancan', diode board, and a bunch of wiring. |

Removing the alternator stator with brushes. |
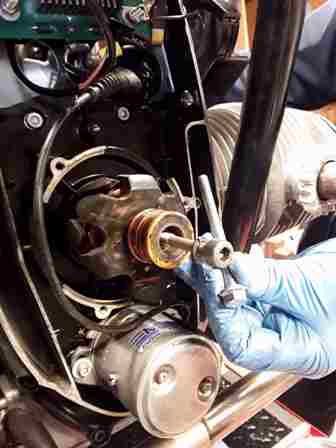
Special tool needed to pop-off the alternator rotor. Keyword, pop! |
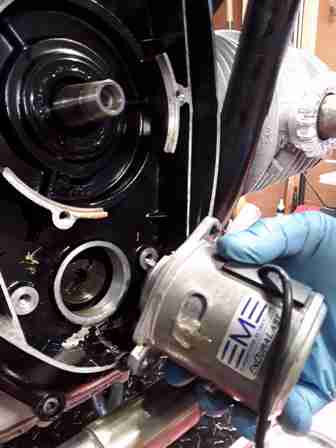
The 'beancan' is easily removed, assuming you know how to disconnect the wire connector. Shhh, it's a secret. |
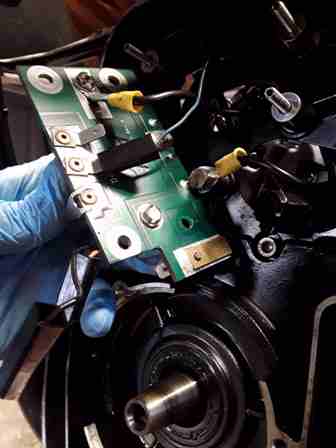
Removing the diode board takes a little dexterity to get to the 4 nuts. It doesn't hurt to remove the gas tank and starter motor cover to get to the back of the studs (remember, onion?). |
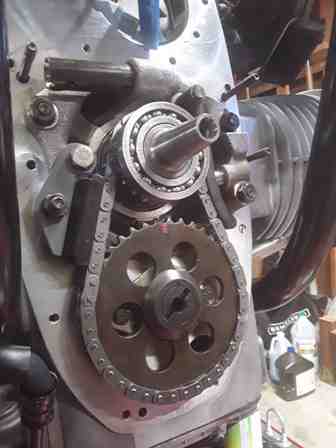
All the electronics removed clearly shows the timing cover case partially hiding the timing chain. Lots of bolts holding this thing on. If it were a real onion, you'd be crying by now. So exciting! |
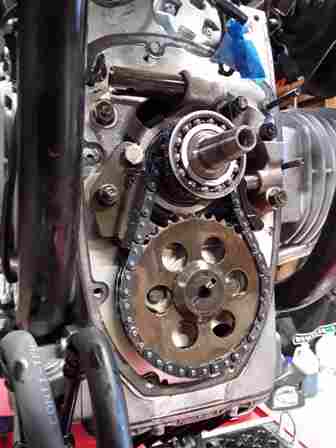
Eureka! Now we need to pull all this off before replacing most everything you see. But first, make sure you make some marks on the timing chain gears. |
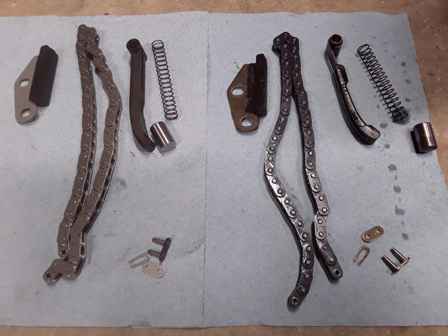
The old slide rail, timing chain and master link, tensioner, piston, and coil spring removed and ready to be replaced with the new. |
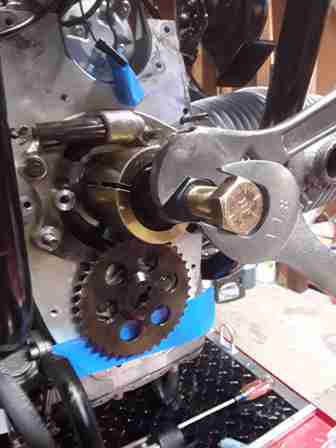
But wait, there's more! Last layer, I promise. Using the CycleWorks.net special tool, pull off the old crankshaft bearing and sprocket. |
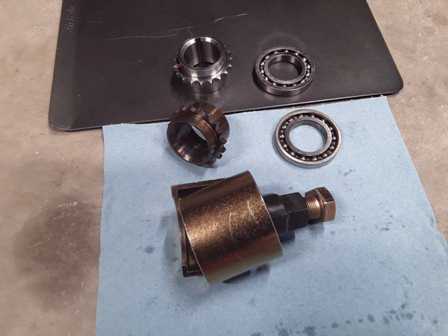
It helps to bake the new crankshaft and bearing before installing (notice the baking pan?). |
Everything removed, so time to start putting the onion back together. |
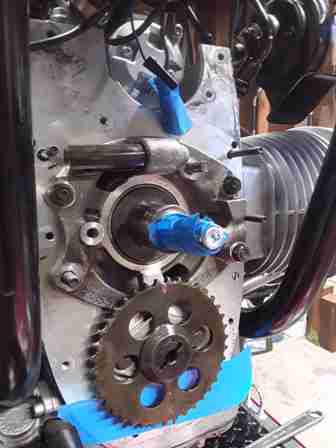
That was quick. All the new timing chain components back together including the new crankshaft bearing and sprocket. |
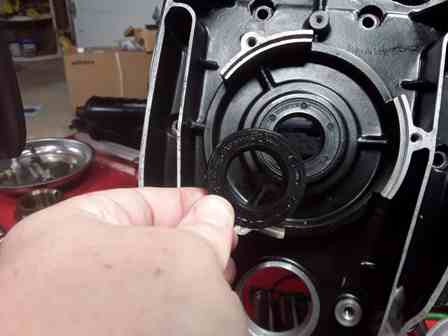
Before installing the timing cover case (and all those bolts), replace the crankshaft seal. |
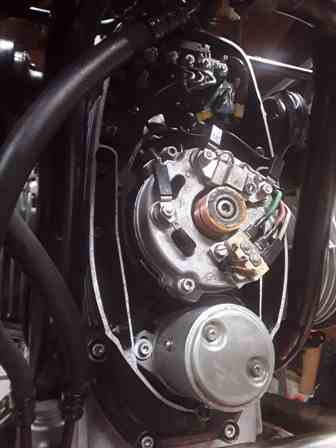
Electronics all back in place, including a new o-ring for the 'beancan'. Pretty much looks the same as before. |
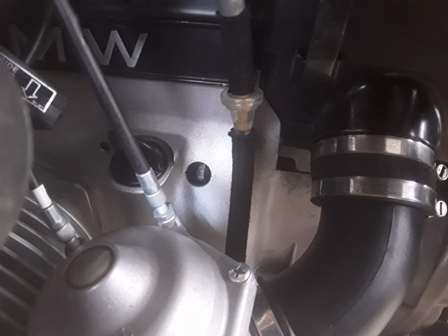
Bike starts and runs, with engine timing mark spot on. Job done! |

Ah man. All that work and it all gets covered back up. I want to recognize the onion in helping me explain this process to you - 'Thanks shallot!' |
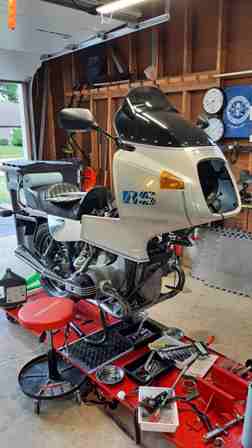
Time for the forks to be rebuilt. Slight wobble and some wear on the fork tubes. |
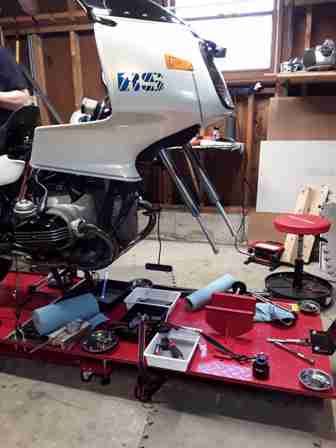
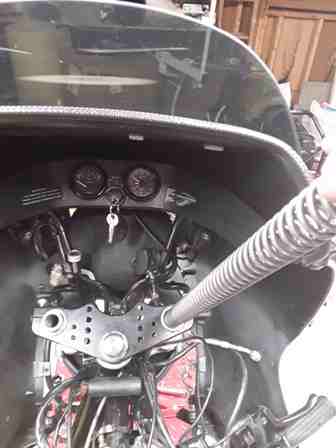
Start at the top. Removal of the gas tank, handlebars, and speedometer/tach display. But I was able to leave the clutch, throttle, and choke cables intact by just moving the bars out of the way. I'm replacing the stock upper triple clamp with a ToasterTan. |
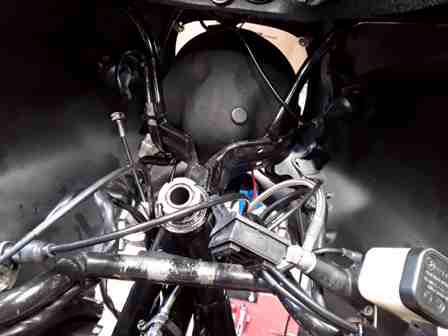
To get access to the lower triple clamp, removal of the front tire, front brake calipers, front brake lines, front fender, lower fairing, and center fairing piece was all that was needed. I probably forgot to mention a few other things. |
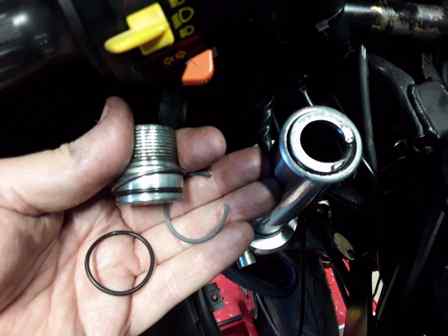
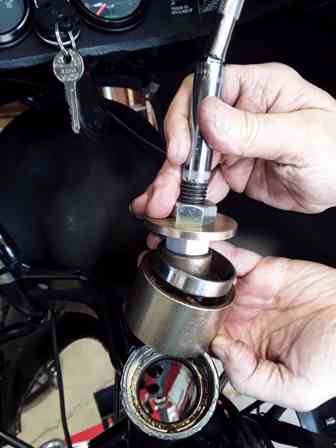
To get to the fork tube innards, removal of the top fork nuts and snap ring was needed. The snap rings and o-rings are getting replaced. |
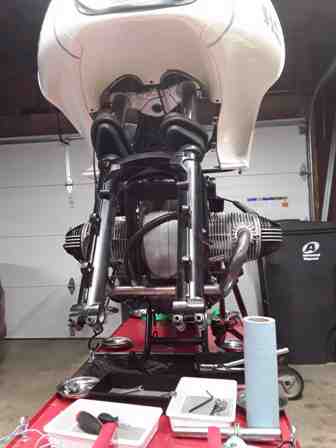
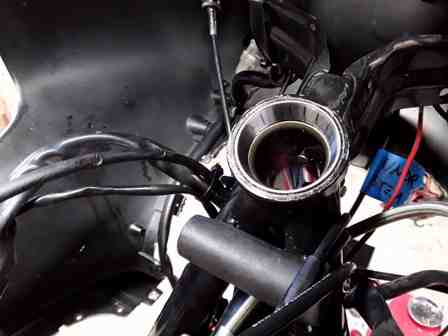
The fork sliders removed, ready to pull the fork tubes. |
Lots of room in the fairing without all that stuff taking up space. |
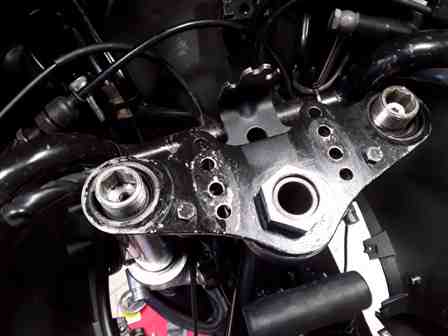
Lower triple clamp removed with the old upper and lower steering head bearings. Both the upper and lower bearings will be replaced. |
Upper steering head bearing race not too bad, but will be replaced. |
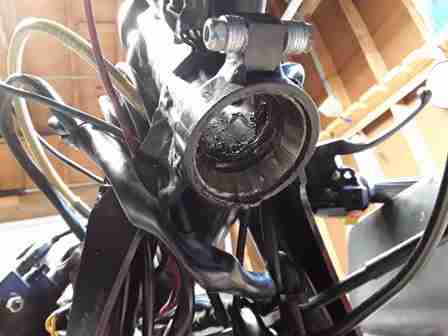
Lower steering head bearing race clearly shows brinelling, and will be replaced. |
Of course, I wouldn't go this far without already having the CycleWorks.net special tool for the steering head bearings and races. |
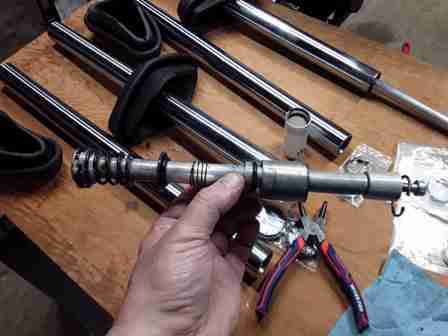
Since I am replacing the fork tubes, I need to swap the fork absorbers to the new (replacing o-rings and seals). |
I have everything I need to start assembly back to normal. |
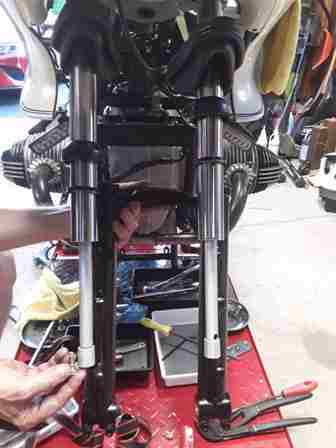
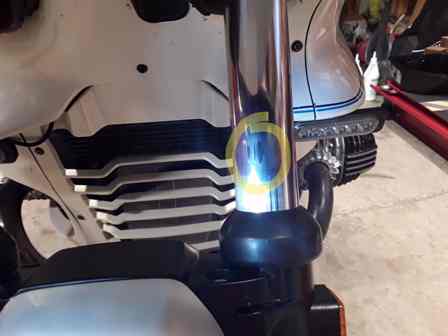
New fork tubes reassembled, aligned, and back in place 160mm above the lower step of the lower triple clamp. New fork boots and fork seals too. |
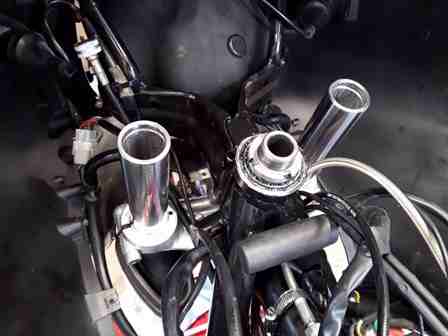
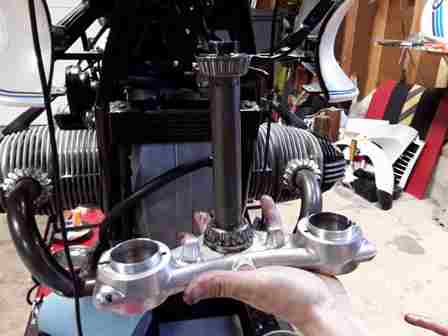
Top view, ready to put the upper triple clamp and insides of the fork tubes together. Oh, and fork oil, I used 320cc per fork. |
Placed this photo in here for artistic value. |
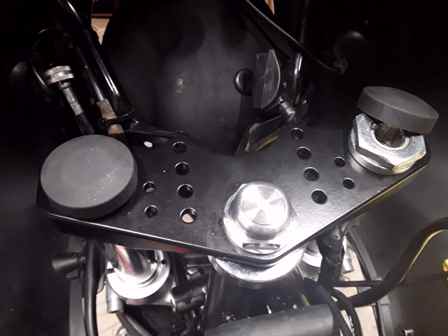
The ToasterTan upper triple clamp, much nicer than the old steel plate. |
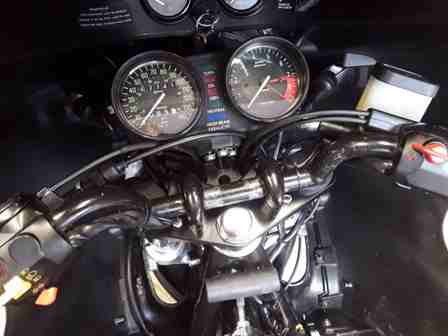
Handlebars back in place along with the speedometer/tach. I had marked the handlebar and risers before removing so I could get the same placement as I previously had. |
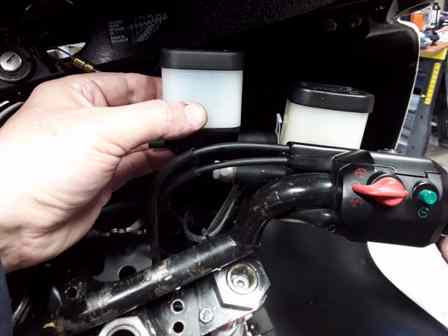
Since I had the brakes apart, replaced the front master cylinder and the stainless-steel brake lines. I previously rebuilt the calipers, new brake pads, and new rotors. |
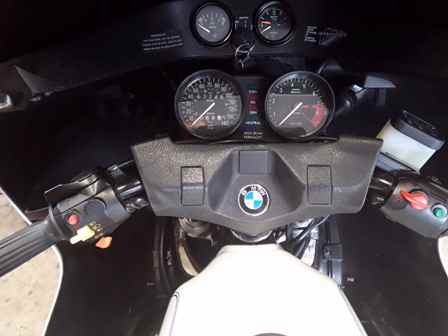
Dash view all done, and nice and pretty again. |
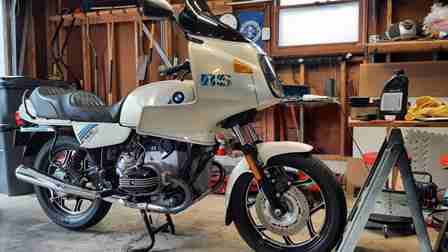
See, back together. I'll put the lower fairing back on after I go for a ride... |
 top
top